 |
| Windy widget or gadget on the right-hand sidebar |
There are widgets (or as Blogger calls them, Gadgets) available for your blog, but as sailors, some of ours are customized. I also have a double sidebar (on the left & right) so some need resizing.
Many of your favorite websites will have HTML code for sharing a widget on your website/blog in their FAQ's (Frequently Asked Questions). Here's a simple one to start:
 |
| Windy.com |
Windy.com is a fun website showing wind & current all over the world! (try zooming in on the Mona Passage between the Dominican Republic and Puerto Rico on a windy day.)
To get their "HTML code" you can do a Google search "Windy widget" or go to https://www.windy.com/widgets?50.067,14.383,5
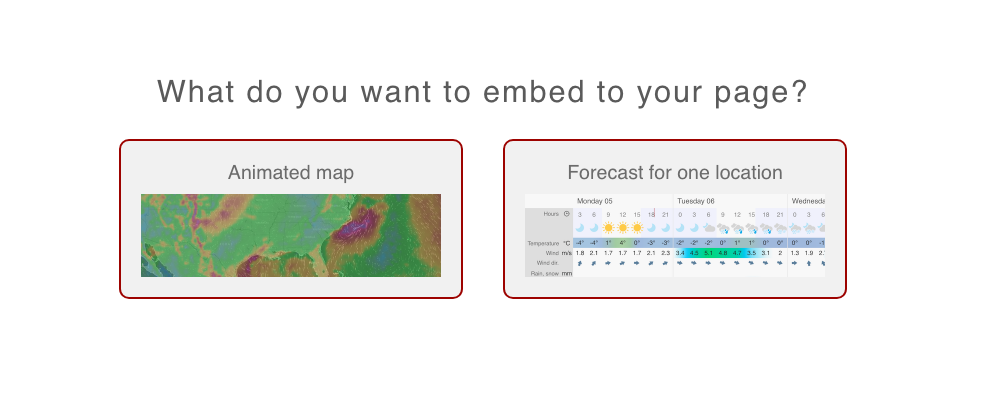 |
| Windy Widget options |
They give you the option of "Animated Map" or "Forecast for one location". For this example, I chose "Animated Map".
 |
| Now let's adjust some settings... |
- Use the map on the right to drag then zoom in & out to find your desired location.
- I resize to "width 200 px x height 200 px".
- Adjust "Overlay" for wind or waves from the drop down menu.
- Now you're ready to copy and paste the HTML code at the bottom.

I use Blogger (WordPress calls it a Widget), so:
- Log in at Blogger.com
- "Layout"
- On the sidebar, "Add Gadget"
- "HTML/Javascript"
- Paste into "Content"
- "Save"
- ("Preview")
- "Save Arrangement"
Stay tuned for creating your own Google Maps and adding them to your Social Media or blog page.
What a great Information are there in it.Secret Wood Coupon
ReplyDelete